Some links in my articles are affiliate links. I may earn a commission when you buy through them.
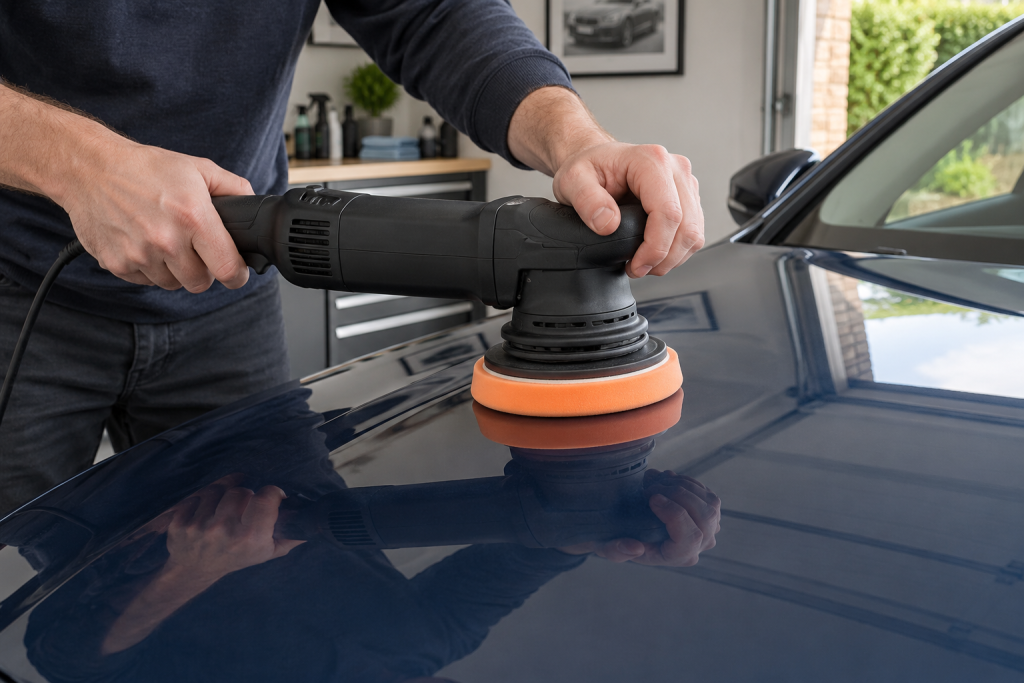
Paint correction means polishing away a little of the surface to reduce swirls, light scratches and haze. On a clear-coated car, you’re working on the clear layer above the colour.
For a car you drive every day, I’d aim for a good-looking finish while leaving as much sound paint as possible. Start with one small test section. You may find that a mild polish gives you all the improvement you wanted, with a few deeper marks best left alone.
Before you start: wash and inspect the car, remove any bonded contamination, then test a mild pad and polish on sound glossy paint. Check the result before working round the car and protect the polished areas afterwards. Keep abrasive polishing away from matte paint, peeling lacquer and exposed colour or primer.
Work out whether polishing is the right job
A raised tar spot, dried product or mineral deposit can look like paint damage at first glance. Clean it off before judging the finish. Polishing over it can drag loosened particles across the paint.
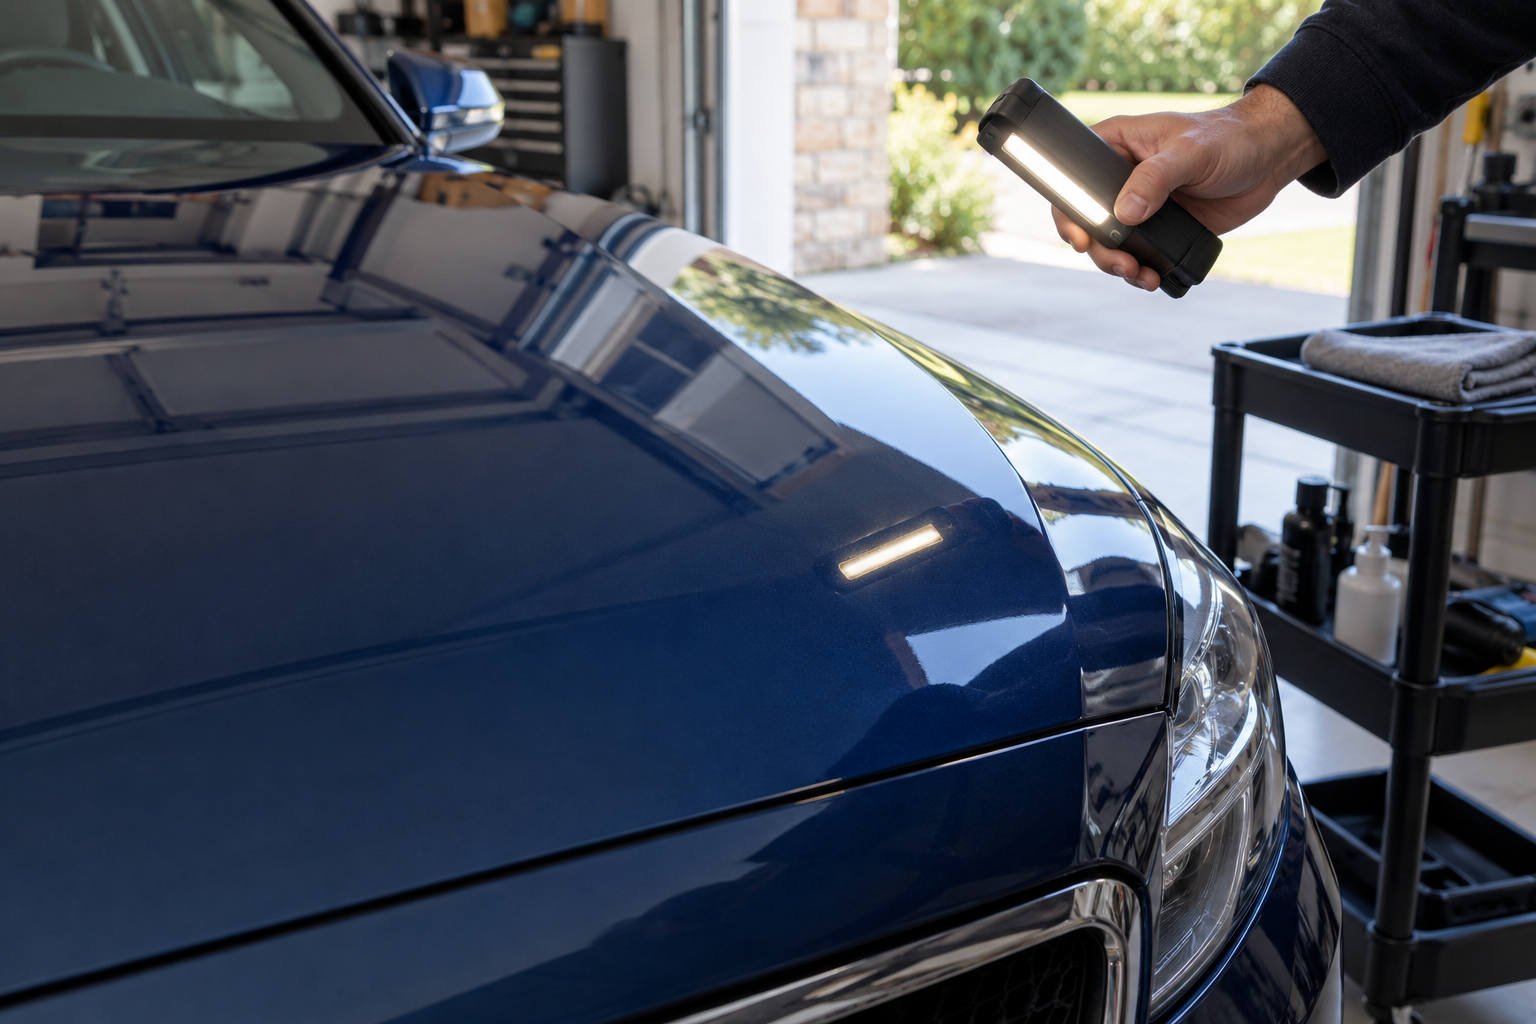
Look at the car dry, in ordinary daylight and with a small directed light. Move your head rather than judging one flattering angle. Fine curved scratches around a light source suggest swirls; a raised spot or smeary film calls for cleaning first. Inspect the cleaned patch again before choosing an abrasive.
If a scratch catches a clean fingernail, reveals another colour or sits in peeling lacquer, don’t make removing it your beginner target. The nail check is a reason to be cautious, not a measurement of remaining clear coat. My scratch assessment guide helps separate a reasonable improvement from damage that needs repair.
Polishing, hiding marks and adding protection
A filling polish can make fine marks less obvious without removing them fully. Some may reappear as it washes away. Wax, sealant and ceramic coating leave protection over the prepared paint; they won’t replace clear coat you’ve already polished off. The polish-versus-wax explanation separates these jobs.
Chips, rust, dents and peeling lacquer need repair. A scratch through the clear coat can’t be polished away without cutting through the surrounding clear coat too. See the deposit-versus-etching checks before treating water marks as correction work.
How much paint can you safely remove?
You can’t work this out from a fixed number of passes. Previous polishing and repairs change what’s left, while the pad, polish and technique change how much you remove. Most ordinary paint-thickness gauges measure the total paint stack over compatible metal, not the clear coat on its own. Even a high reading isn’t permission to keep cutting: it may include a previous repair.
Get experienced help before heavily correcting unknown or repaired paint. Leave a stubborn deep scratch once the surrounding light marks have improved. And leave wet sanding out of a first home session; the sanding marks create another job you then have to polish out.
Pick a result you can sensibly finish
For a first attempt, I’d choose one sound panel and aim for clearer reflections with fewer light swirls. It gives you room to learn the machine and discover how that paint responds. Completing a bonnet neatly is more useful than leaving the whole car half compounded because the light has gone.
A one-stage polish means one abrasive stage, not one sweep over the entire vehicle. You still wash, prepare, inspect and protect. A two-stage correction adds a separate finer polishing stage after compounding. It can improve the finish when the cutting stage leaves haze, but it also adds work and removes more material. Let the test section decide whether you need it.
The kit I’d put together
Set out your pads, polish, clean buffing cloths, an inspection light and protection for afterwards. Have a clean container ready for used pads so they don’t end up face-down on the drive.
A variable-speed free-spinning dual-action machine is a manageable starting point for occasional home work. Choose the approved backing plate and compatible pads, with a clean pad reserved for each polish. Corded and cordless setups have different access and battery requirements; the first-polisher guide explains the movement, plate size and power choices.
For light marks, start with a finishing polish and a compatible mild foam pad. Test that before considering compound. A cutting pad can make the same liquid work more aggressively, so check both parts of the combination and keep cutting and finishing pads separate.
Have spare pads of the grade you actually use. A bundle of five different grades won’t give you a fresh polishing pad when that one is loaded. Our pad buying guide explains plate size, working-face size and a sensible starting quantity.
Get the paint clean and ready
Wash the car thoroughly and dry it before inspecting. If you need the full order, follow the car-washing guide. Pay particular attention to crevices that can release water later: trapped drips around mirrors and badges are irritating when you’re trying to keep a polishing section consistent.
Treat visible tar with the appropriate tar-removal method, and consider iron fallout remover where contamination warrants it. Clay is for contamination that remains after washing and chemical treatment; leave an already smooth panel alone. Use lubrication and a clean working face, following the clay-bar method. Claying can leave fine marks, so do it before the polishing test.
Remove jewellery that could touch the car, keep clothing fastenings away from the panel and organise the cable so it cannot drag over the finish. Protect sensitive trim and edges with suitable automotive masking tape where appropriate. Test tape on questionable repairs and avoid sticking it to loose lacquer.
Try a small test section first
Pick a small area you can comfortably cover while keeping the pad flat. An area about 40 cm square is a useful starting point for a full-size machine. On a narrow or curved panel, make the section smaller or work by hand. Keep a nearby untreated area available for comparison.
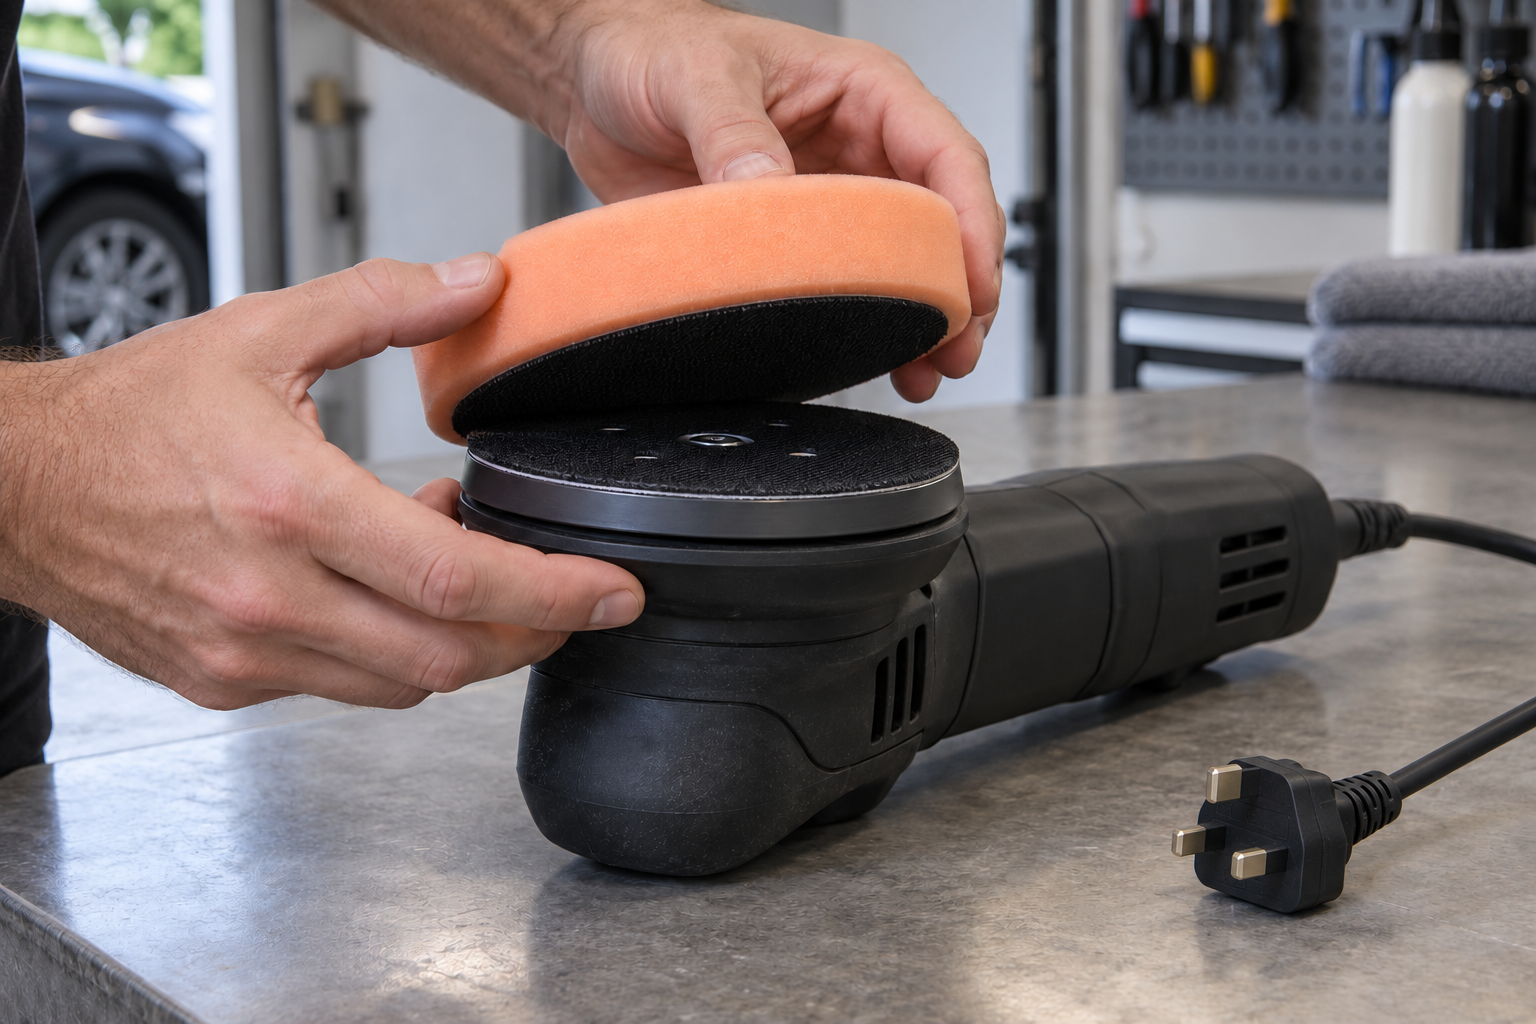
Start with the mild combination recommended for the polish and pad. Set up the machine according to its instructions; a speed number on one model does not transfer neatly to another. Fit and centre the pad with the power disconnected, check its condition and load it according to the pad-and-polish directions. Foam and microfibre systems do not all need identical preparation.
Place the pad on the paint before starting. Spread the product at the appropriate low setting, then work at the recommended polishing setting. Keep the pad face level and make slow, overlapping passes across the section, then across the other direction. Don’t park the running machine on one spot while thinking about the next move.
On a free-spinning DA, excessive pressure and awkward angles can stall pad rotation. Correct your position and lighten the load instead of leaning harder. Keep moving, and stop if the panel or pad becomes hot; a DA still needs care around edges and thin or repaired paint.
Switch off and let the pad stop while it is still supported on the panel, then lift away. Wipe residue with a clean cloth using light pressure. Inspect before adding more product. If it looks good, keep that combination. If it has improved but needs another cautious pass, reassess the clean pad and technique first. If it is clearer but cloudy, investigate polishing haze before reaching for a stronger compound.
Use the test result to choose the next step
If the light polish gives you a finish you like, keep that combination. If the paint looks clear but shallow swirls remain, test a slightly stronger pad or compound. If the section looks worse, feels hot or has new marks, stop and find the cause before doing more.
Change one thing at a time where possible. Swapping the pad, liquid, speed and pressure together makes it hard to tell what helped or what caused a worse finish. The compound-versus-polish guide gives you a clearer way to choose the liquid without assuming that the strongest bottle is the best starting point.
Avoid treating a shiny, oily surface as proof that every defect has been permanently removed. Some polishes enhance gloss or temporarily disguise marks as well as abrading. Where you need to check the bare result, use a paint-compatible inspection product as directed, then inspect gently. Don’t improvise an aggressive solvent mixture on uncertain paint.
Work round the car, checking as you go
Once the test works, repeat it on similarly sound areas. Divide panels into comfortable sections and overlap the boundaries so you don’t leave an untreated strip. Keep a mental note of where you have been; a simple panel-by-panel order is easier to follow than jumping to every scratch you notice.
Clean the pad frequently and change to a fresh one when it becomes loaded, warm or less effective. Don’t keep feeding polish into saturated foam. Follow the pad-cleaning routine at the end of the session so dried residue doesn’t become the next job’s problem.
Use hand polishing or a smaller machine for body creases, door-handle recesses and narrow painted strips where the full-size pad won’t sit flat. Don’t balance a large machine on the rim of its pad just to reach the last centimetre.
Finish with protection and a kinder wash routine
Wipe remaining polish from panel gaps and check the car in another light. Choose your wax, sealant or ceramic protection, then prepare the surface for it. The hand-waxing method covers a straightforward finish.
Before applying a ceramic coating, remove polishing oils with the preparation wipe it specifies. Use the home coating method and plan around its curing and rain limits. Keep the booster guide for later maintenance, once the coating has cured.
Keep wash equipment and drying towels clean afterwards. The two-bucket wash and gentle drying method help you avoid putting fresh marks into the finish.
Can you polish a car outside?
You can work outside when the paint is cool, the weather is settled and the area is free of blowing grit. Short daylight and unexpected drizzle make a smaller target sensible. Allow enough time to finish and protect the area you start, and follow the protection product’s conditions for staying dry afterwards.
If wind keeps depositing particles on the panel, stop. A canopy can keep some weather off but doesn’t create a dust-free garage. Similarly, starting just before dusk makes inspection harder, even if you can physically keep the machine running. I’d rather plan two manageable sessions than hurry a whole car under poor light.
How long will the correction last?
A scratch you’ve removed won’t grow back, but you can add new ones through washing and drying. Marks hidden by fillers may also reappear as those fillers wear away. Inspect the paint before another correction rather than making it an annual job.