Some links in my articles are affiliate links. I may earn a commission when you buy through them.
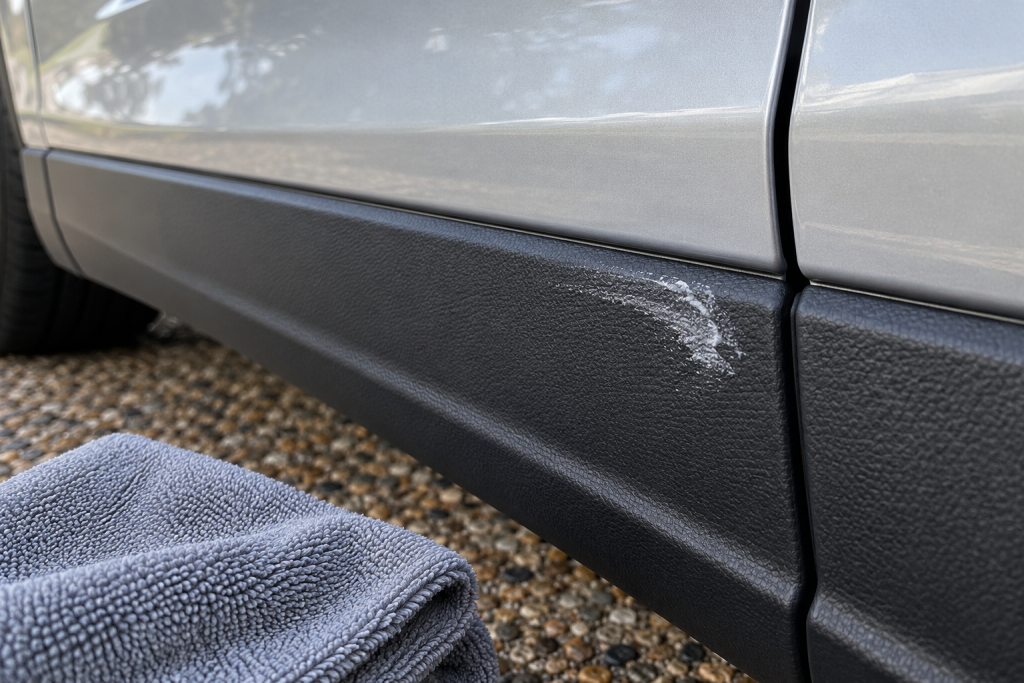
White marks on black plastic are especially annoying when you’ve just finished polishing the paint beside it. If the pale line follows your applicator’s path or sits in the textured grain, start by checking for polish residue. For Super Resin Polish on unpainted trim, Autoglym specifically recommends Autoglym Fast Glass and a clean microfibre to remove it.
Clean a small section first and judge it dry before buying a restorer. A dark dressing can change how the plastic looks without telling you whether you removed the white deposit. If the marks came from a different wax, polish or coating, identify that product and its approved cleanup method before borrowing this one.
Residue, fading or damage?
Look at where the pale area begins and ends. A narrow swipe beside polished paint, a mark around the end of a trim strip or white material caught in the grain points towards something left on the surface. Broad, gradual lightening across exposed trim can have a different cause.
Wash away ordinary dirt and let the surface dry before inspecting it closely. Wet plastic often looks darker, which can hide what you’re trying to identify. Compare the mark with an untouched section in the same light rather than rubbing the whole panel straight away.
Peeling, cracking, a smooth scuffed patch or a missing surface coating needs a different decision. If a small cleaning test leaves the mark unchanged, check the material and condition before increasing pressure. A pale mark alone doesn’t establish which chemical will remove it.
Start with the known polish and a clean cloth
Autoglym’s current Super Resin Polish questions identify Fast Glass as the cleanup product for accidental residue on unpainted surfaces. Its own UK information also permits use on bodywork and trim. Don’t substitute a different glass cleaner without checking its material compatibility and the polish maker’s removal advice.
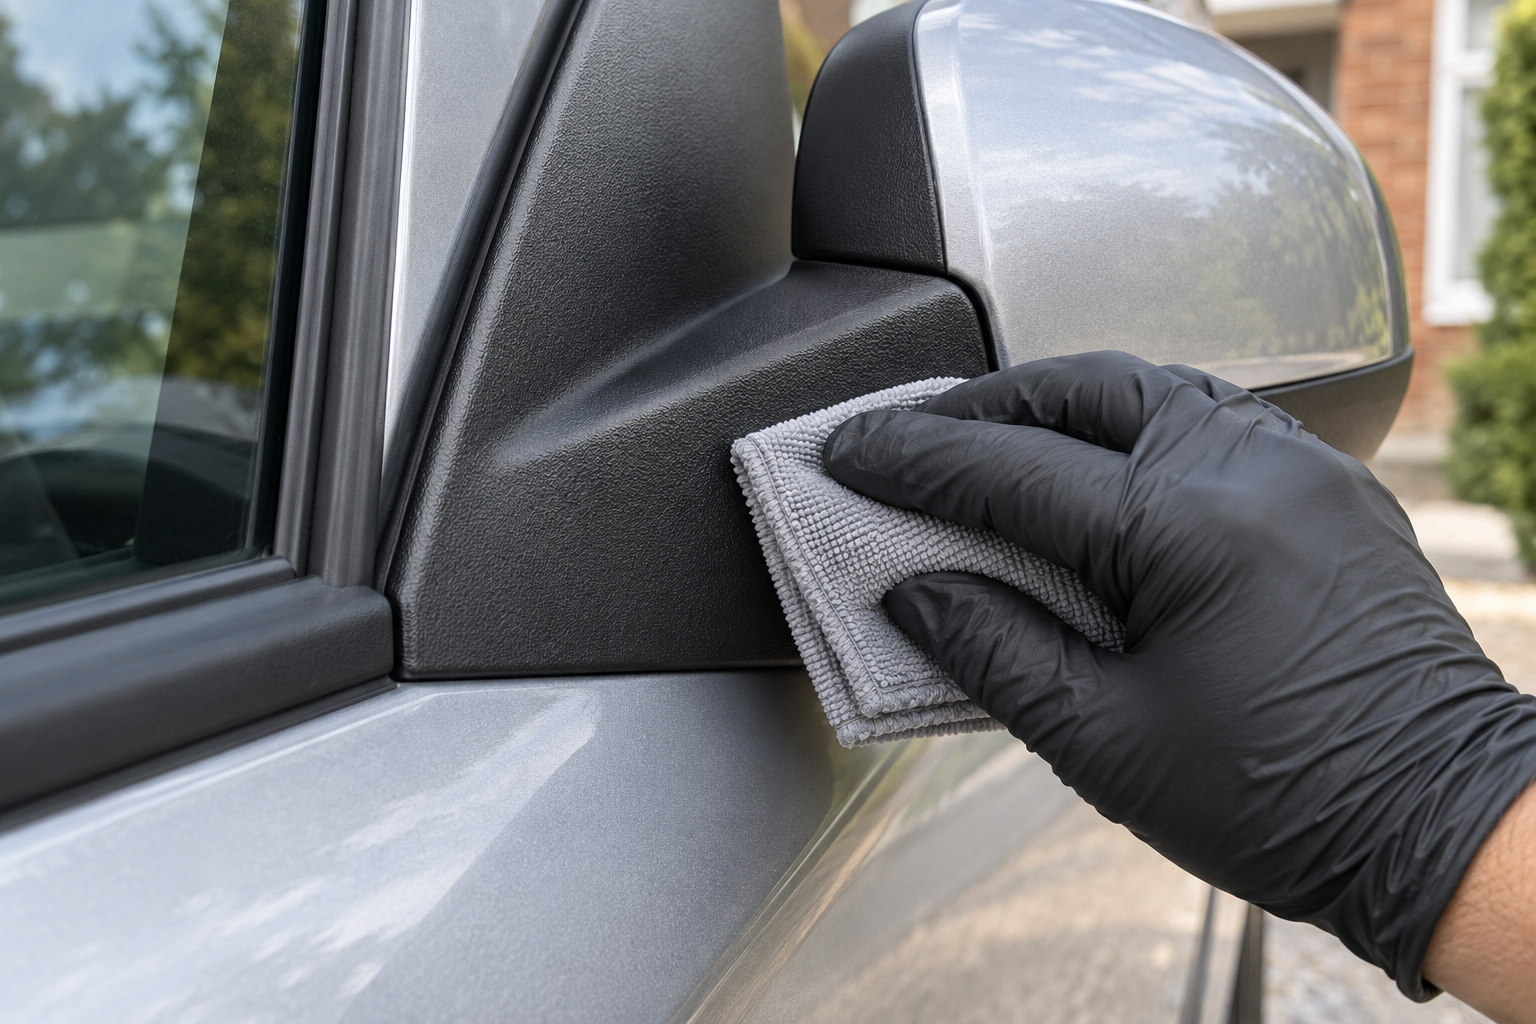
Set out clean microfibres with fresh faces available. Pick a discreet part of the affected trim for the first pass. If the trim is wrapped, painted, already coated or has an uncertain finish, confirm its material-specific cleaning restrictions before proceeding.
Keep the cleaner local to the mark. A lightly wetted cloth gives you control beside a paint boundary and avoids misting neighbouring surfaces unnecessarily. Use enough to help the cloth lift residue without soaking a join.
Lift the residue, then inspect the dry section
- Begin with the plastic free of loose dirt so the cloth isn’t dragging grit over it.
- Apply Fast Glass sparingly to a clean cloth face and work gently across the small affected area. Follow the texture rather than digging at one pale point.
- Turn to a clean face as the cloth picks up residue. Wipe away what has loosened instead of repeatedly spreading it along the trim.
- Finish with a separate clean face and let the area dry. Check in daylight from the same angle as the untreated mark.
- If the deposit has reduced, continue in similarly small sections. If it is unchanged or the finish begins to alter, stop and reassess the material and the product that caused it.
A dry inspection between passes is useful. If the mark only disappears while the surface is damp and returns unchanged as it dries, you haven’t yet established that the cleaning has removed it. More pressure on the same small spot can leave a different-looking patch of texture.
What if the white mark stays?
Check the history before trying another bottle. Is it definitely polish, or could it be dried wax, a coating residue, mineral deposit or an altered surface? Find the original product’s cleanup advice and confirm the trim finish. Keep the result of your small test in mind when describing the problem to the maker.
Avoid jumping to household solvents, abrasive pads or a stiff scraping tool. Those can turn a removable deposit into a change in texture or sheen. There is no single stronger cleaner I’d prescribe for every unidentified white mark on plastic.
If residue has been trapped under a previous dressing or coating, its approved removal method becomes part of the job. Don’t assume a second layer will fix the pale area. For general uneven fading on sound unpainted trim, the restoration overview helps you choose the next step after cleaning.
Choose the finish after the cleaning
Once you can assess the clean dry surface, decide whether it needs any appearance treatment. If it looks even again, you may have solved the problem without a restorer. If sound plastic remains generally faded, compare the choices in the exterior-trim buying guide.
For ordinary upkeep on compatible exterior plastic and rubber, Autoglym Bumper & Trim Gel is my dressing choice. Apply to a clean dry surface, spread evenly and buff the excess away. Autoglym specifically says that excess removal helps prevent runs in wet weather.
If you intend to use a plastic coating, complete its full preparation rather than relying only on the disappearance of the white mark. The C4 method explains the separate cleaning and immediate residue-removal routine. Keep a silicone dressing out of that preparation stage.
Keep the next polish off the trim
Use an applicator small enough to control beside the boundary and keep a clean cloth handy for accidental contact. A pad loaded for a broad bonnet is awkward around a narrow painted strip beside textured plastic. Slow down at that edge instead of carrying the same broad stroke across both materials.
Keep the polishing cloths and trim applicators separate. Check the edges as you finish each section, while a mistake is still easy to spot. If you use masking tape, choose a product approved for the surface and check its removal requirements rather than leaving unknown tape on delicate trim.
The cleanup recommendation comes from Autoglym’s Super Resin Polish questions and Fast Glass material guidance.